
For every CityFibre connection, on or off-net you will be supplied a managed Cisco C1117-4P router as standard. This guide will help you to plug it in and connect to the NTE.
The Cisco box includes:
- Cisco C1117-4P Router
- External PSU and cable
- Ethernet cable / Multimode fibre cable and SFP / RJ11 (DSL) cable
Rear view of Cisco router:

- Position the router where both the NTE and power are accessible. Before powering up the router connects the ethernet/fibre cable from the ethernet/fibre port labelled 0/0/0 to the NTE.
Please see the images below for information regarding the location of the
required port.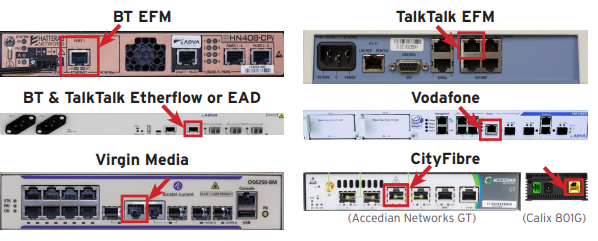
- Apply power to the router, noting it will take several minutes to fully boot. After the router has booted, there should be a link light between the router and the NTE. If you powered up the router before connecting it to the NTE please power-cycle the router.
- Use LAN port 0 (left-most RJ45) to connect the router to your network. Configure your firewall and LAN equipment to use the IP address range previously provided to you.
Again, you should get a link light to indicate a connection. If you have one, connect the telephone line for your broadband backup to the right-most port. - Finally, connect to your own router to test your connectivity to ensure the new service is functioning as intended.
If you have any questions or difficulties installing this equipment or your NTE isn’t listed, please contact our technical support team on 01908 350750
End.