
In this tutorial you will learn how to configure your Unifi Controller 7.0.22 Guest Hotspot with Vouchers. This will come handy if you’re a hotel or some type of business looking to control guest access to your Wi-Fi using a finite time-based voucher
Before we start make sure you are on Unifi Controller 7.0.22 or later and proceed to adopt all your Unifi devices into your controller. Make sure all firmware is updated as well.
The Tutorial Run Down
- Configure a Guest Network.
- Configure Bandwidth Profile.
- Configure a SSID for a group of access points.
- Configure Guest Hotspot Profile with vouchers.
- Simple way to manage vouchers.
Let’s start by configuring the Guest Network.
1. Log into your Unifi Controller 7.0.22
2. Once you’re on the dashboard click Settings. 
3. Now locate and click on Networks.
4. Now that you’re on the Networks Section locate and click on Create New Network.

5. For our New Network let’s do the following
- Name your network Guest Hotspot
- Uncheck Auto Scale Network
- Change your Host Address to something different, in my case I am changing it to 192.168.168.1 and a Netmask of /24 this will give us 249 available addresses for guest devices. If you require more addresses change the Netmask from the dropdown list.

6. Scroll down and change Advanced Configuration to Manual. 
7. In Advanced Configuration let’s make the following changes.
- Change your VLAN ID. I like matching the VLAN ID’s to the 3rd octette of the subnets so in my case it will be 168.
- For Network Type, select Guest Network.
- For Content Filtering select Work.
- Make sure Multicast DNS is Enabled.

8. Now we can click on the Add Network button to create the network.
Configure Bandwidth Profile for Guest Hotspot
1. Locate and click Profiles.
2. Scroll down until you locate Bandwidth Profile and select Create New Bandwidth Profile.
3. Name your Bandwidth Profile, Guest Hotspot. Provide your Download and Upload limits and click Apply Changes.
Configuring a Guest SSID for a group of Access Points.
1. Locate and click on the WiFi option. 
2. Now that we are in the WiFi Settings page click on Create New WiFi Network.
3. Here on the New WiFi Network page fill out the Name for your SSID and provide a simple password. 
4. In the Network section click on the dropdown, locate Guest Hotspot or whichever name you decided to name your Guest Network and select it.
5. Now this next section, this option is entirely up to you if you would like to use all available access points or just use a select few for Guest WiFi Services. I am going to create a group for just 1 access point for the purpose of this tutorial. Select Create New Group.
7. In this New Group I will select all the access points I want to provide Guest Hotspot services to. Name your access point group and select the access points you want to use. When done click the Save Changes button.
8. Now under Broadcasting AP’s make sure only the group you wish to use is selected.
9. Locate Advanced Configuration and select Manual. We will be making some advanced setting changes here.
10. Let’s start by configuring the following advanced options.
- WiFi Band – Uncheck 2.4GHz this is an old noisy technology that will just limit bandwidth and make your guests frustrated.
- WiFi Type – Select Guest Hotspot

11. Under Bandwidth Profile from the dropdown select Guest Hotspot
12. Scroll down until you locate Security. For Security Protocol we will mark this as open since our guest vouchers will be controlling access. 
13. Now we can click on the Add WiFi Network button to create the SSID.
Configuring Guest Hotspot Profile with Vouchers
1. Now we will have some fun configuring the Guest Hotspot with Vouchers. Locate and click on Profiles.
2. The Guest Hotspot table should be first on your list and you should see a Default policy there. Go ahead and click on it to open it.
3. Now that we are on the Guest Hotspot page find Authentication Type and from the drop-down options select Vouchers.
4. Once Vouchers are selected, we can now Add a New Voucher. We will be creating a few for your guests. 
5. There are many ways to go about setting up vouchers however I will be showing you the most practical way for guests and employees to understand when handling vouchers.
6. Now that the Add a New Voucher window is open, we will configure a per day per device access solution.
- Name – Create Vouchers based on days a guest will be staying. For example:
-1 Day – Guest Hotspot Access
-2 Day – Guest Hotspot Access
-3 Day – Guest Hotspot Access
-4 Day – Guest Hotspot Access
-5 Day – Guest Hotspot Access
-6 Day – Guest Hotspot Access
-7 Day – Guest Hotspot Access - Quantity – Depends on your guest arrival device trends on how many you would like to have readily available. For the sake of the tutorial, I will be providing 25 vouchers for each number of days.
- Voucher Usage – Select Multi-Use and set it to 10. This will allow the voucher package to be used up to 10 guest devices.
- Expiration – Since this is the 1 Day voucher set it for 24 hours. The 2 Day voucher will be 48 hours and so on.
- Download limit – We want to be mindful of our available ISP bandwidth. In a perfect world we would have and ISP for Guest and an ISP for Corporate.

7. The end result should look something like this.
8. Locate Guest Landing Page and turn it to ON.
9. Now you are able to edit the look and feel of the landing page to match your business.
10. For Terms of Service make sure this is Enabled. You want to protect your company with a disclaimer for use. 
11. Now your complete, click the Apply Changes button.
Simple way to manage vouchers
Here I will be providing a simple way scenario to provide access to guests.
1. Locate and click Profiles.
2. Click on the Default Guest Hotspot policy.
3. Locate Hotspot Manager. Click Open Hotspot Manager.
4. You should now be on the Hotspot Manager page. Click on Vouchers.
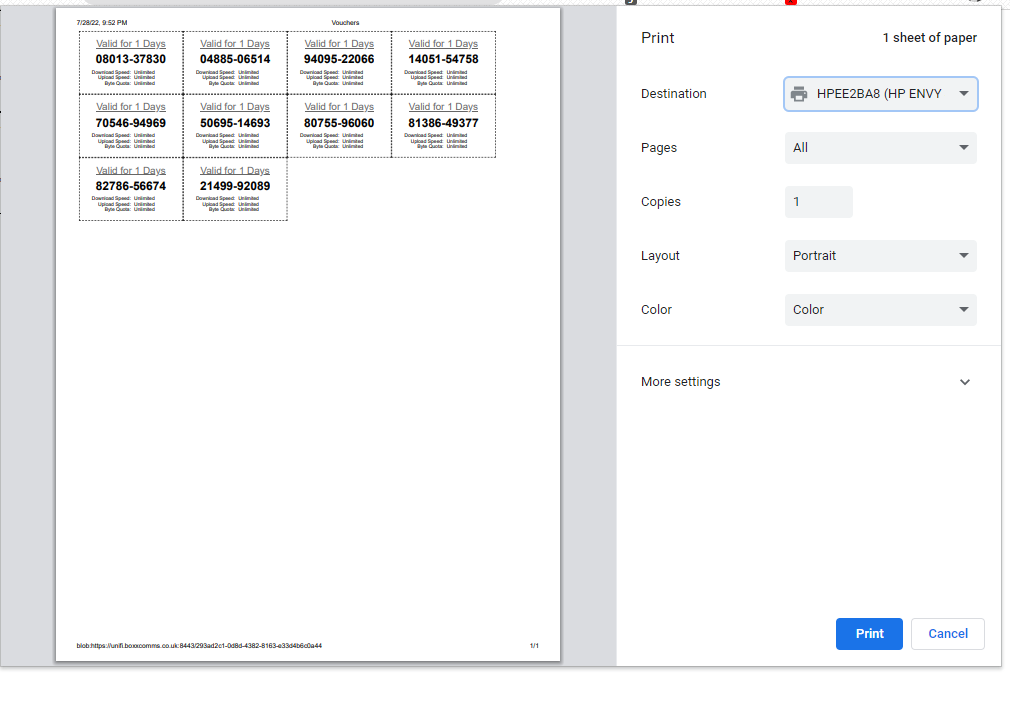
5. Click, Print all unused vouchers.
6. Now you should be presented with a print window, and you can print all the vouchers to provide to your guests. You can also play around with the settings under more settings within this print preview to display them differently.
It should look something like this >
END