
How to set up call routing schedules on Gamma Horizon.
Schedules
You can set up schedules within Horizon for certain features to behave a certain way during certain times of the day.
Setup Schedules
Step 1
Log into your Horizon admin account. (you will need to be an admin to activate and apply schedules. To gain access please request this via support@boxxcomms.co.uk)
Step 2
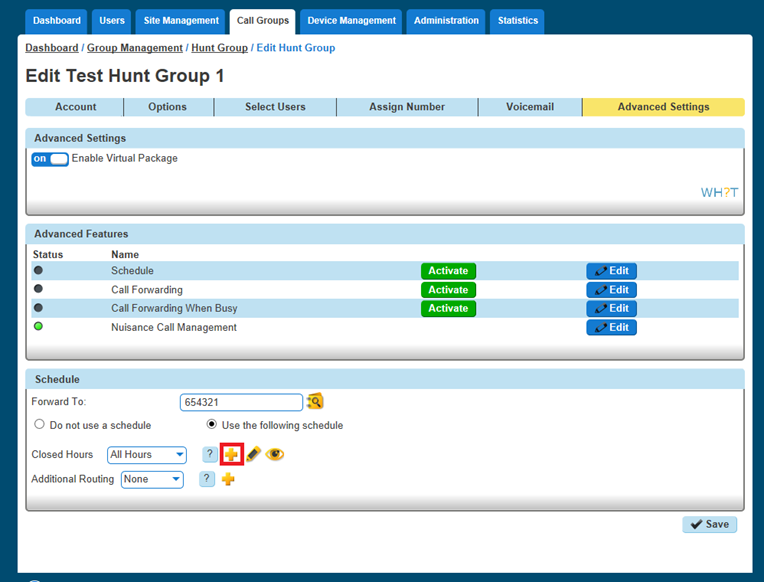
Select the Call Group that you want to apply the schedule to using the Call Groups menu and then click Edit. Select Advanced Settings, set Enable Virtual Package to on, and edit next to Schedule.
Step 4
In Closed hours, you can select either a predefined schedule you've previously set up or click the + icon to create a new schedule.
Step 5
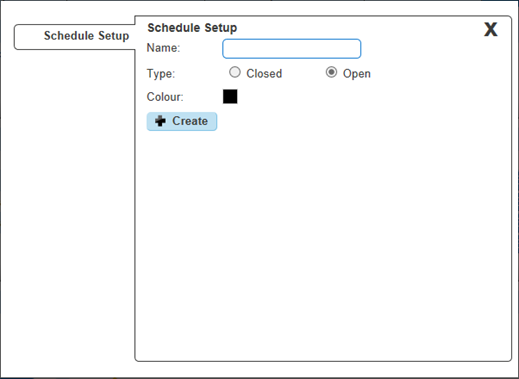
Name the Schedule something memorable. The schedule needs to be set to "Open", even if you are setting up a schedule for outside of business hours, the colour you'd like to assign to the schedule for appearing on the calendar and then click "+ Create".
Step 6
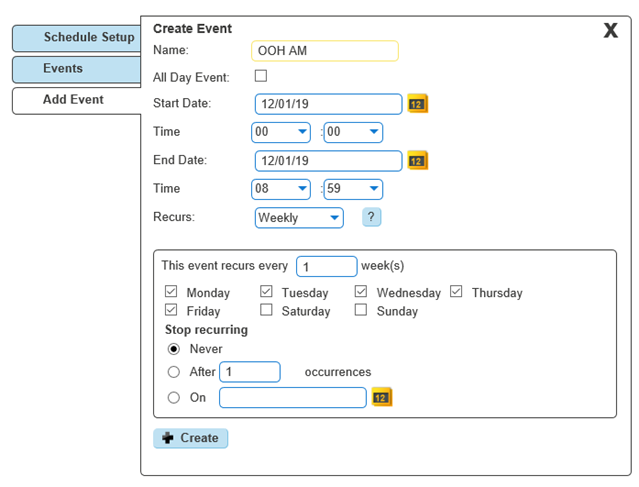
Now you can Add Events to the schedule, therefore building the schedule. Name the event, if the event is all day keep this ticked, if it is between two times, untick the All Day Event option and this will give you extra options under the Start and End Date fields which allows you to set the time. Select how often you want the event to occur and then click create.
Please note the following when creating a schedule:
- An all Day Event is from 00:00 until 23:59 on the selected day.
- To define hours (such as office hours), untick the "All Day Event" box and define the time. Also, select the "Weekly" option and tick all the days you wish to have selected.
- Recommended if you want an out-of-hours schedule - select all days apart from Saturday and Sunday.

Example out-of-hours schedules (Company open hours 09:00 - 17:00 Monday to Friday)
Your first event should cover the morning out of hours, in this case from 00:00 (midnight) – 08:59. We want this to recur weekly on Monday – Friday so you will need to tick Mon/Tue/Wed/Thu/Fri and click create at the bottom.
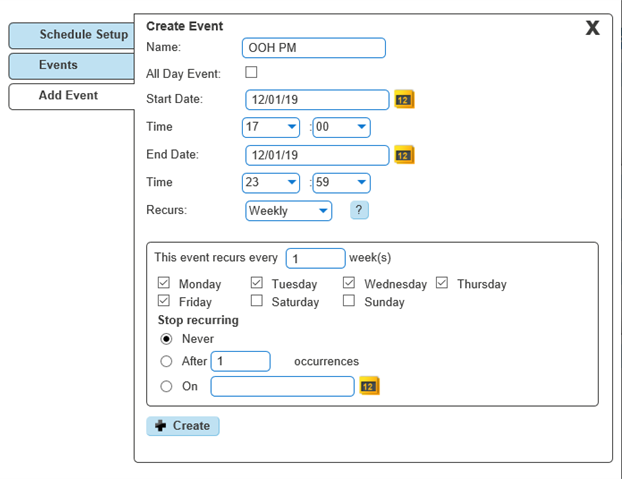
The next step is to click ‘Add’ in the events page which will then take you back to the creating a new event page. Create your afternoon out of hours, in this case from 17:00 – 23:59. We also want this event to recur weekly from Monday – Friday.
You will now need to add in the weekend section. As the office is closed all weekend we can leave ‘All Day Event’ ticked. We want this to recur weekly on Saturdays and Sundays.
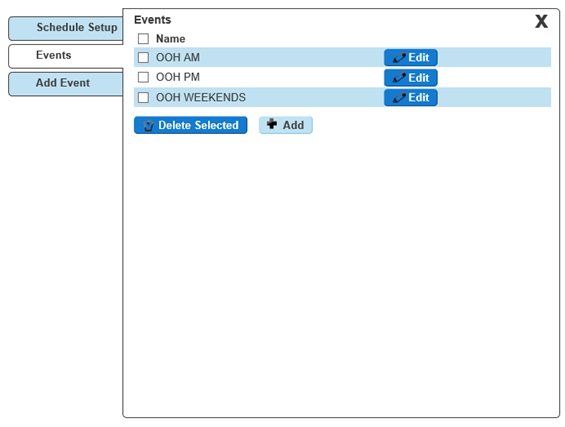
After you have saved all of your events, you will see them here under ‘Events’ where you can either add more, edit the existing events or if you are happy with what is already created, click the X to close this pop-out.
Once you are happy with your events, click the X and you should now see this page. You will need to input a number or extension number into the Forward To: box. This is where calls will be diverted to whenever it is within the scheduled hours.
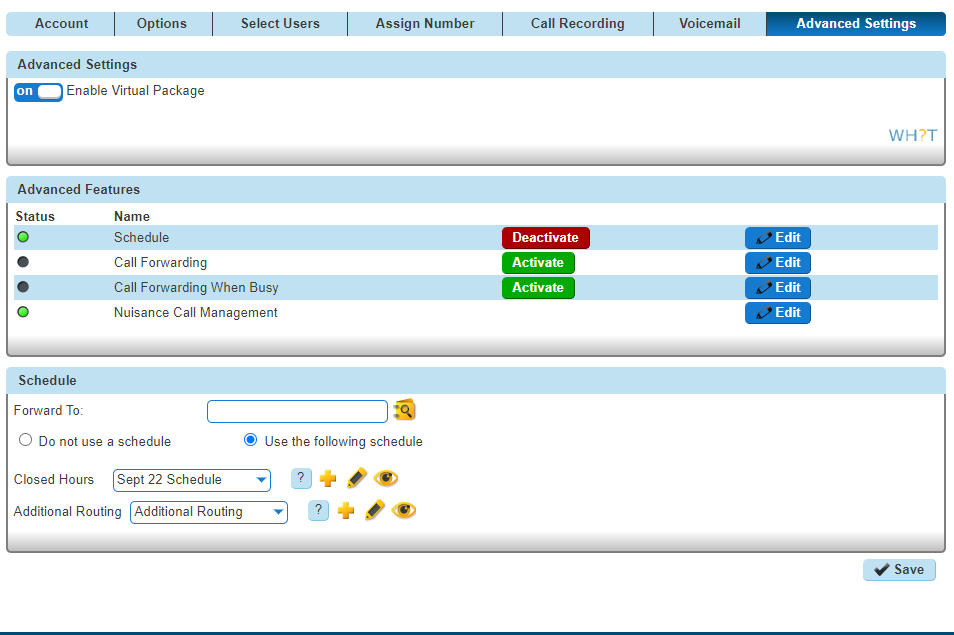
Please note if you wish to forward the call to the voicemail box of this particular group, you will need to input the company voice portal extension here (the extension only, as when putting in the full number for the voice portal it will act as if you are calling the company voice portal).
After you have created your schedule and have inputted the number you wish for calls to forward to during the scheduled hours, click ‘save’ at the bottom of the page to save your schedule settings. and to activate this schedule click the ‘Activate’ button halfway up the page and then click ‘save’ again.
The above example is a basic schedule, for more complex schedules please contact the support team who will be able to advise how to create a schedule based on your requirements.