
Voicemail
For Voicemail to work, the Horizon Company needs the Voice Portal to be set up first.
- Voicemails have a 30-day limit. This applies to all messages left on the voice portal, including saved messages. If you wish to save certain messages, we recommend using the "Notification Settings" when editing a user to send an email with a file of the voicemail by selecting "Notify Me at the address".
- The capacity on a voicemail is 100 minutes. After this, the caller will be unable to leave a voicemail message.
- The user can skip to the end of the voicemail message by pressing 6.
Voicemail Map
Go to our Knowledgebase to download a copy of our Horizon Voicemail Map.
Setup Voicemail for a user
Step 1
Log into the Gamma Portal and go to Provisioning and Service Management, Hosted, Horizon and Horizon Manage Company.
Step 2
Select your account and login to the company that you want by using the "Actions" button select "Login to Horizon".
Step 3
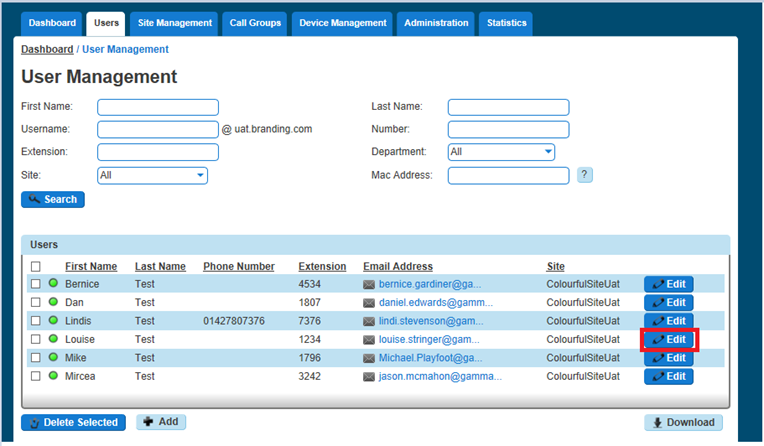
Click the "Users" option and then select "List Users" so you can search for the user that you want Voicemail set up for.
Locate the user and click the "Edit" button.

Step 4
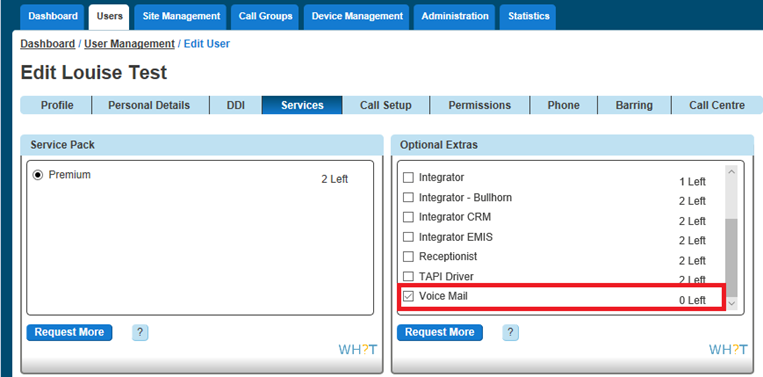
Click on "Services" and ensure that you've got ensure Voicemail services left, and then tick the tick box. If you haven't, these can be ordered on the Gamma Portal using the "Manage Bolt ons" action
Step 5
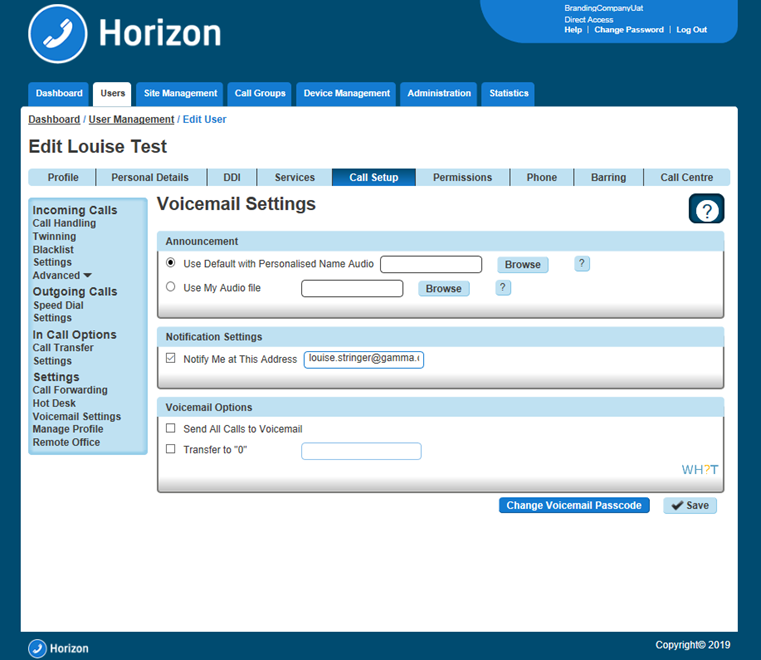
Click "Call Setup" and under the Settings header, click "Voicemail Settings". Here, you can choose which file is to be played upon no answer as well as choosing to receive an email notification when a voice mail is left.

Step 6
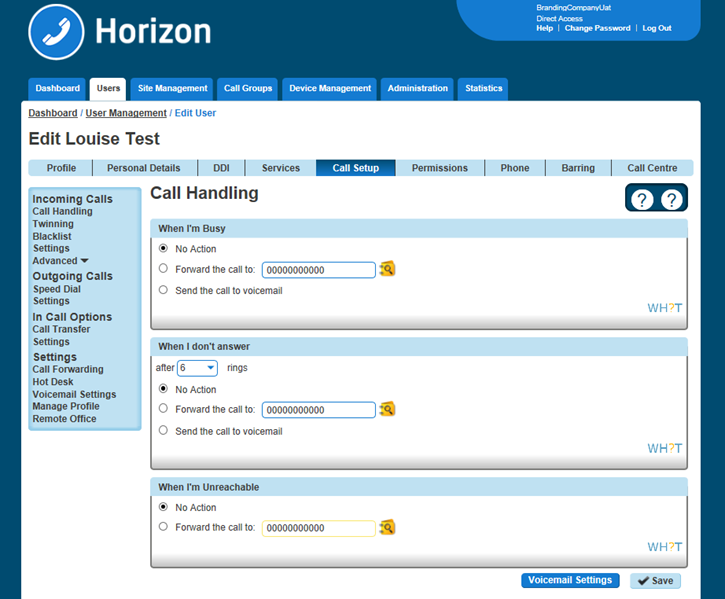
Now select Call handling" under the Incoming Calls menu so that you can set up what calls should be sent to the users voicemail, and when.
Setup Voicemail from a handset
You can setup voicemail directly from a user's handset, including personalised name greetings, no answer greetings and busy greetings. This can be applied to both a user or group telephone number.
Step 1
Dial the company Voice Portal and enter the user or group extension number when prompted for an ID.
Step 2
Enter the passcode of the user / group.
If the user does not know their password, then this can always be reset in the "Edit User" tab on the Horizon Portal.
A hunt group the passcode can be manually set in the "Edit Hunt Group" page under the Voicemail tab.
Step 3
If the user is accessing this voicemail box for the first time, then the Voice Portal will ask the user to change the passcode.
The Voice Portal will then proceed to ask the user to record a personalised name greeting. The user must do this in order to proceed.
Step 4
After this is complete the user should be presented with the following message:
"You are now ready to use your voicemail system. To access your voice mailbox, press 1".
Press ‘1’ to listen to your messages, to change ‘your mailbox busy greeting’, press ‘2’ and to change ‘your mailbox no answer greeting’ press ‘3’.
Step 5
Finally, you will need to specify on the Horizon Portal what message you would wish to use during "No Answer" and "Busy" actions
Change a user's passcode for Voicemail
Step 1
Log into the Gamma Portal and go to Provisioning and Service Management, Hosted, Horizon and Horizon Manage Company.
Step 2
Select your account and login to the company that you want by using the "Actions" button select "Login to Horizon".
Step 3
Click the "Users" option and then select "List Users" so you can search for the user that you want to change the passcode for.
Locate the user and click the "Edit" button.
Step 4
Click "Call Setup" and under the Settings header, click "Voicemail Settings". From here you can click the "Change Voicemail Password" button. This will generate an email to the user with a new voicemail passcode.
Change a user's passcode for Voicemail
Step 1
Log into the Gamma Portal and go to Provisioning and Service Management, Hosted, Horizon and Horizon Manage Company.
Step 2
Select your account and login to the company that you want by using the "Actions" button select "Login to Horizon".
Step 3
Click the "Call Groups" option and then select "Hunt Group" or "Call Queue Group". Locate the call group and click the "Edit" button.
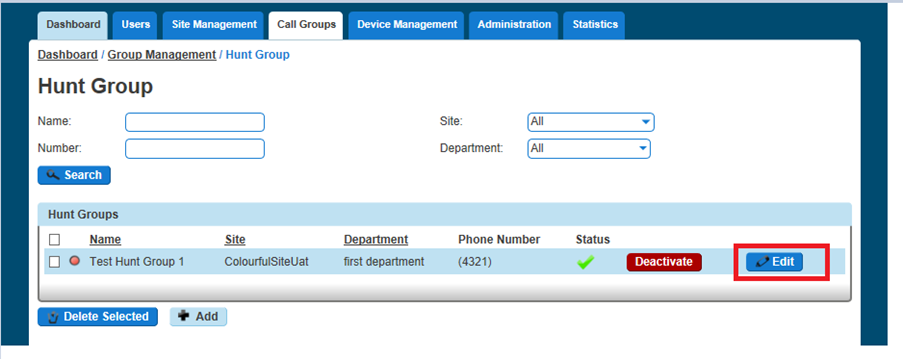
Step 4
Click on "Voicemail" from here you can edit the Settings, and if you want to enable voicemail.
Now select Call handling under the Incoming Calls menu so that you can set up what calls should be sent to the group voicemail, and when.
Send All Calls To Voicemail
Step 1
Log into the Gamma Portal and go to Provisioning and Service Management, Hosted, Horizon and Horizon Manage Company.
Step 2
Select your account and login to the company that you want by using the "Actions" button select "Login to Horizon".
Step 3
Click the "Users" option and then select "List Users" so you can search for the user that you want to amend the Voicemail settings for and click the "Edit" button.
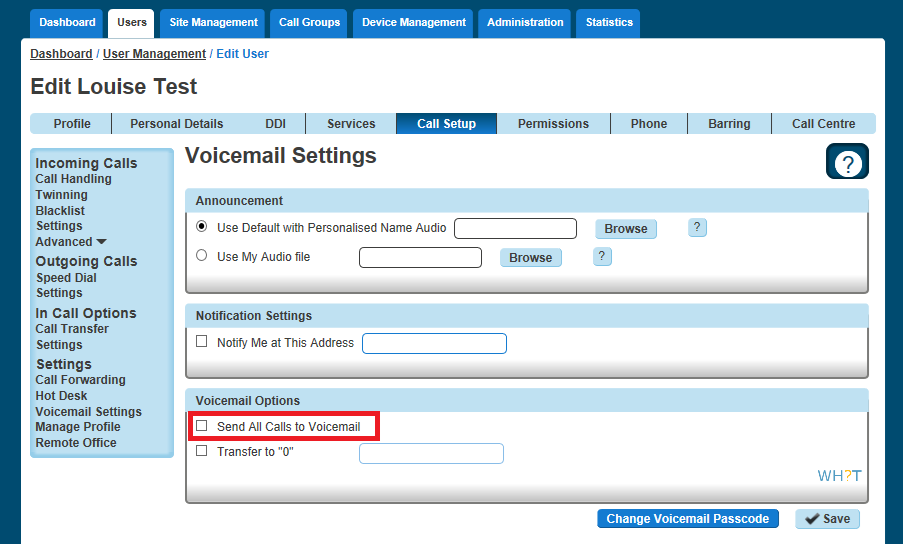
Step 4
Select the "Call Setup" tab and click Voicemail Settings. Towards the bottom of this page there will be a "Voicemail Options" section and here you will be able to tick the Send All Calls to Voicemail box.
Transfer on 0 for Voicemail
Step 1
Log into the Gamma Portal and go to Provisioning and Service Management, Hosted, Horizon and Horizon Manage Company.
Step 2
Select your account and login to the company that you want by using the "Actions" button select "Login to Horizon".
Step 3
Click the "User Management" button and next to your selected User click "Edit".
Step 4
On the Edit screen select the "Call Setup" tab at the top of the screen and then click Voicemail Settings. Here you will be able to tick the "Transfer to 0" box.
To ensure the caller is aware of the transfer option this feature provides, it is important that the user records an appropriate voicemail message such as the following example:
“Hi, you’re through to the voicemail of ___. I can’t take your call right now so please leave a message and I’ll get back to you. Alternatively, press 0 to be transferred to the Service Desk”
This voicemail greeting should advise that the feature is available to the calling party in addition to programming the destination number.
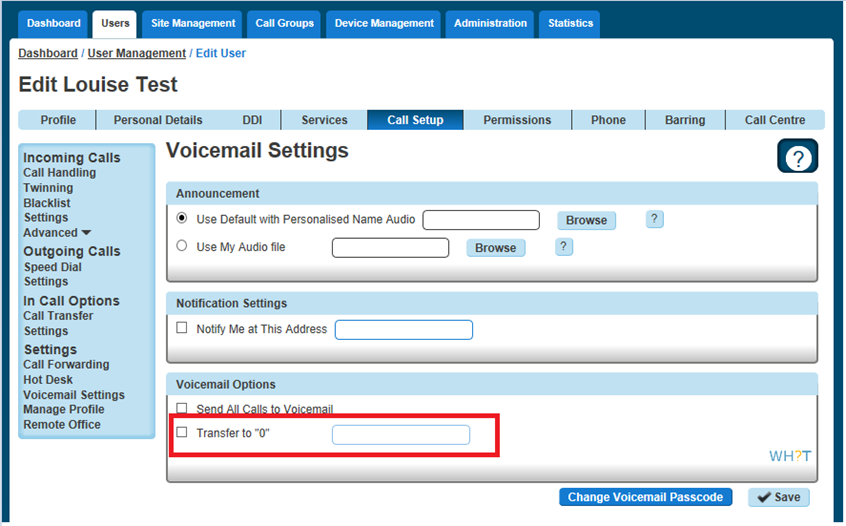
Please note, it not currently possible to program an extension number into the provided field, the full DDI number must be used.